 Save
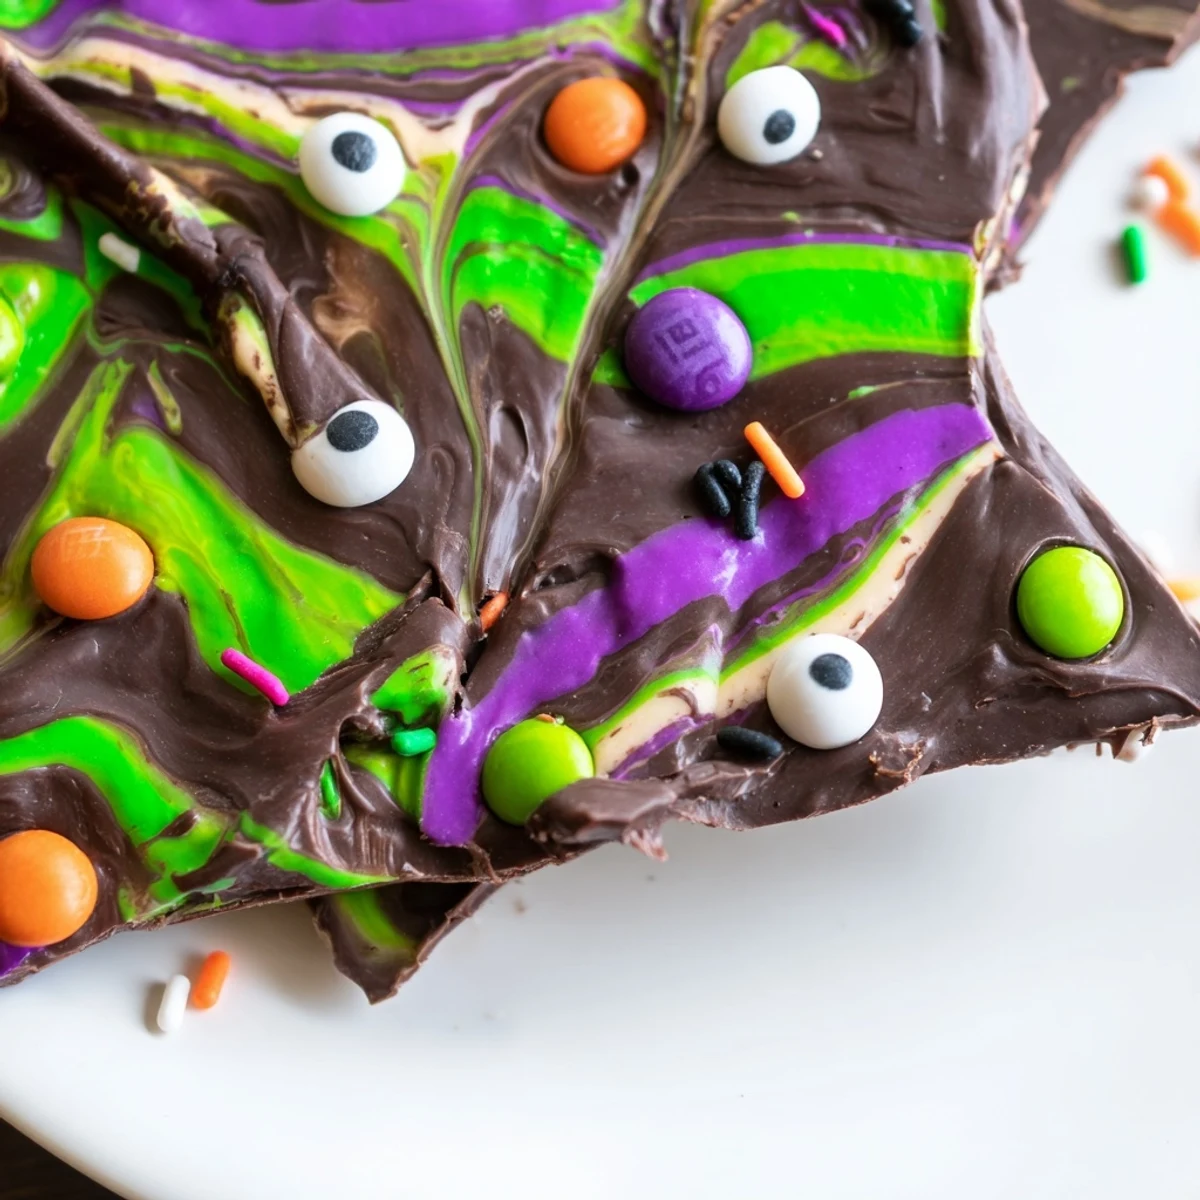
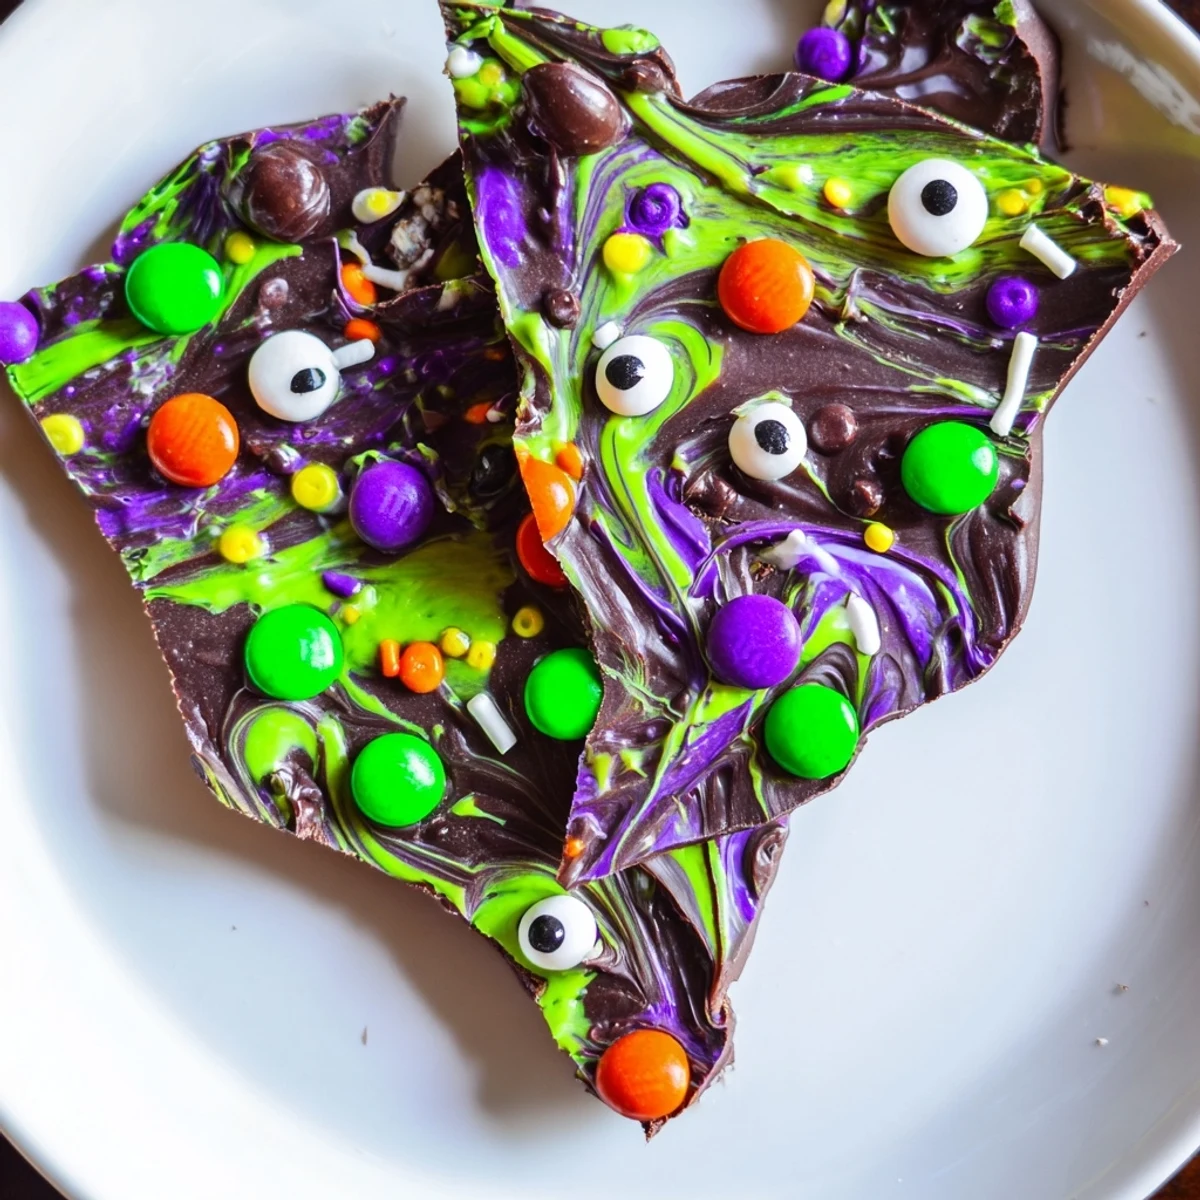
Save This swirled chocolate bark combines melted semisweet and white chocolate with vibrant candy melts in green, orange, and purple. The marbled effect creates a spooky backdrop for candy eyes and colorful sprinkles. Simply melt, spread, swirl the colors together, then top with your favorite Halloween candies while warm. Break into jagged pieces once set for a delightfully eerie presentation that's perfect for parties, gift-giving, or festive snacking.
Last October, my kitchen looked like a candy factory explosion and I could not have been happier. I was attempting to make something that would entertain a dozen kids who would rather be trick-or-treating than sitting at a table. The resulting bark disappeared faster than any decorated cookies I have ever made, with children fighting over the pieces with the most candy eyes.
I now make this every year for Halloween parties, and the adults hover around the serving platter just as eagerly as the children. Last year my neighbor asked for the recipe before she even finished her first piece, and someone actually took a photo of it before grabbing a serving. The messy, colorful swirls make every piece look unique and special.
Ingredients
- Semisweet chocolate chips: The deep chocolate base balances the sweetness of the toppings and creates that classic bark foundation
- White chocolate chips: Essential for the marble effect and adds creamy contrast against the darker chocolate
- Colorful candy melts: These bring the Halloween colors without needing artificial food coloring
- Mini candy-coated chocolates: Provide satisfying crunch and pops of color that make the bark festive
- Candy eyes: The spooky element that makes everyone laugh and pick their favorite piece
- Halloween sprinkles: Add final sparkle and tie everything together thematically
Instructions
- Prep your workspace:
- Line a baking sheet with parchment paper so you can easily remove the bark later and have a ready surface for swirling
- Melt the dark chocolate base:
- Heat semisweet chocolate chips in 30-second intervals, stirring thoroughly each time until perfectly smooth and glossy
- Spread the foundation:
- Pour melted dark chocolate onto your prepared sheet and spread to about 1/4 inch thickness, working quickly before it starts to set
- Melt the remaining chocolates:
- In separate bowls, microwave white chocolate chips and colorful candy melts in 20-second bursts until smooth
- Create the swirls:
- Drop spoonfuls of white and colored chocolates over the dark base, then drag a toothpick through the colors to marble them together
- Add the spooky decorations:
- While everything is still warm, scatter candy-coated chocolates, candy eyes, and sprinkles across the surface
- Let it set completely:
- Leave at room temperature or refrigerate for 10-15 minutes until the chocolate is firm and breaks cleanly
- Break into pieces:
- Use your hands to snap the bark into irregular shards, which looks more rustic and appealing than perfect squares
 Save
Save This has become my go-to contribution for classroom Halloween parties and office treat tables. I love that I can customize the colors for different holidays, swapping the orange and purple for red and green at Christmas. The best part is watching people examine each piece to find the one with the perfect arrangement of decorations.
Making It Your Own
I have learned that the possibilities for customization are endless once you understand the basic technique. The marble effect works with any color combination you can imagine, and you can swap the toppings based on holidays or personal preference.
Working With Chocolate
Melting chocolate in the microwave requires patience more than anything else. I have seized enough batches to know that stopping 15 seconds before you think it is done is usually perfect, since the residual heat finishes the job as you stir.
Storage And Serving
The bark keeps remarkably well in an airtight container at room temperature for up to a week, which makes it perfect for preparing ahead of parties. I layer pieces between parchment paper to prevent sticking.
- Refrigerate for 15 minutes if your kitchen runs warm and the chocolate will not set
- Pack in clear treat bags tied with orange ribbon for instant party favors
- Break into smaller pieces if serving alongside other desserts so guests can try everything
 Save
Save There is something joyfully chaotic about this recipe that embodies everything fun about Halloween. The messier and more colorful the result, the better it looks and tastes.
Recipe FAQs
- → How do I create the marbled swirl effect?
-
Drop spoonfuls of melted white chocolate and colorful candy melts over the dark chocolate base while still warm. Use a toothpick or skewer to gently swirl the colors together, creating irregular marbled patterns. Work quickly before the chocolate sets.
- → Can I use different types of chocolate?
-
Absolutely. Replace semisweet chocolate with milk chocolate for a sweeter taste or dark chocolate for intense richness. Just ensure proper melting times as different chocolate varieties may heat at slightly different rates in the microwave.
- → How long does this bark stay fresh?
-
Store in an airtight container at cool room temperature for up to one week. Avoid refrigeration unless necessary, as condensation can cause the chocolate to bloom and lose its glossy appearance. Keep away from heat sources and direct sunlight.
- → What decorations work best for Halloween?
-
Candy eyes are essential for the witchy theme. Combine with orange and green candy melts, purple sprinkles, candy corn, or themed chocolate buttons. Mini marshmallows or gummy worms can add extra spooky texture and visual interest to your swirled creation.
- → Can I make this nut-free for allergies?
-
Yes, carefully select nut-free candies and check all chocolate labels for allergen warnings. Many major brands offer nut-free versions of candy-coated chocolates and sprinkles. Always verify individual packaging to ensure safety for those with specific allergies.
