 Save
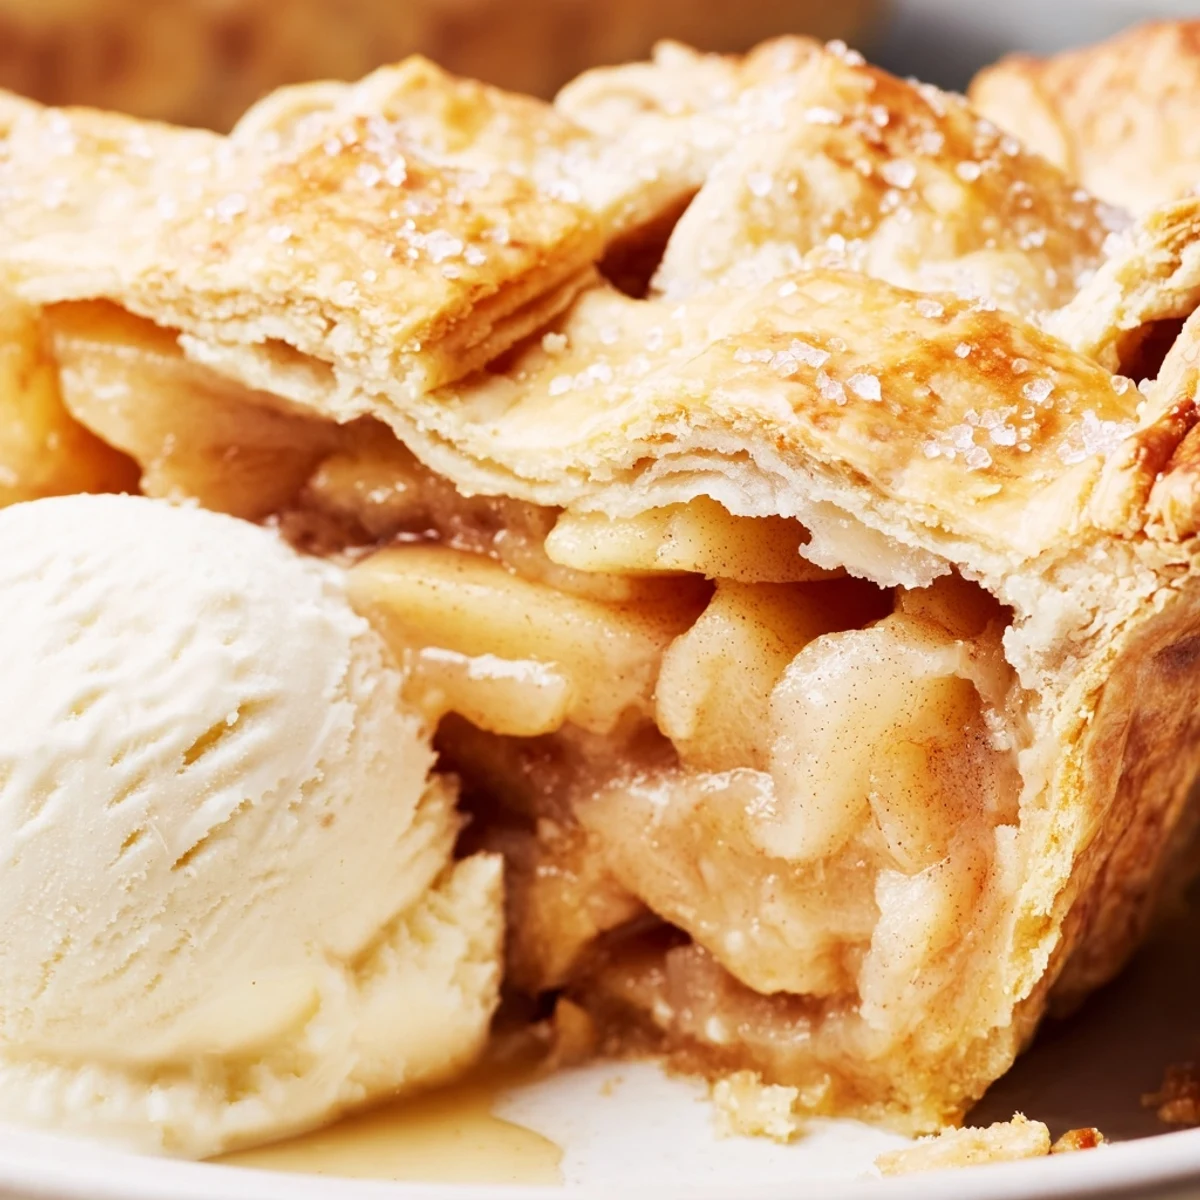
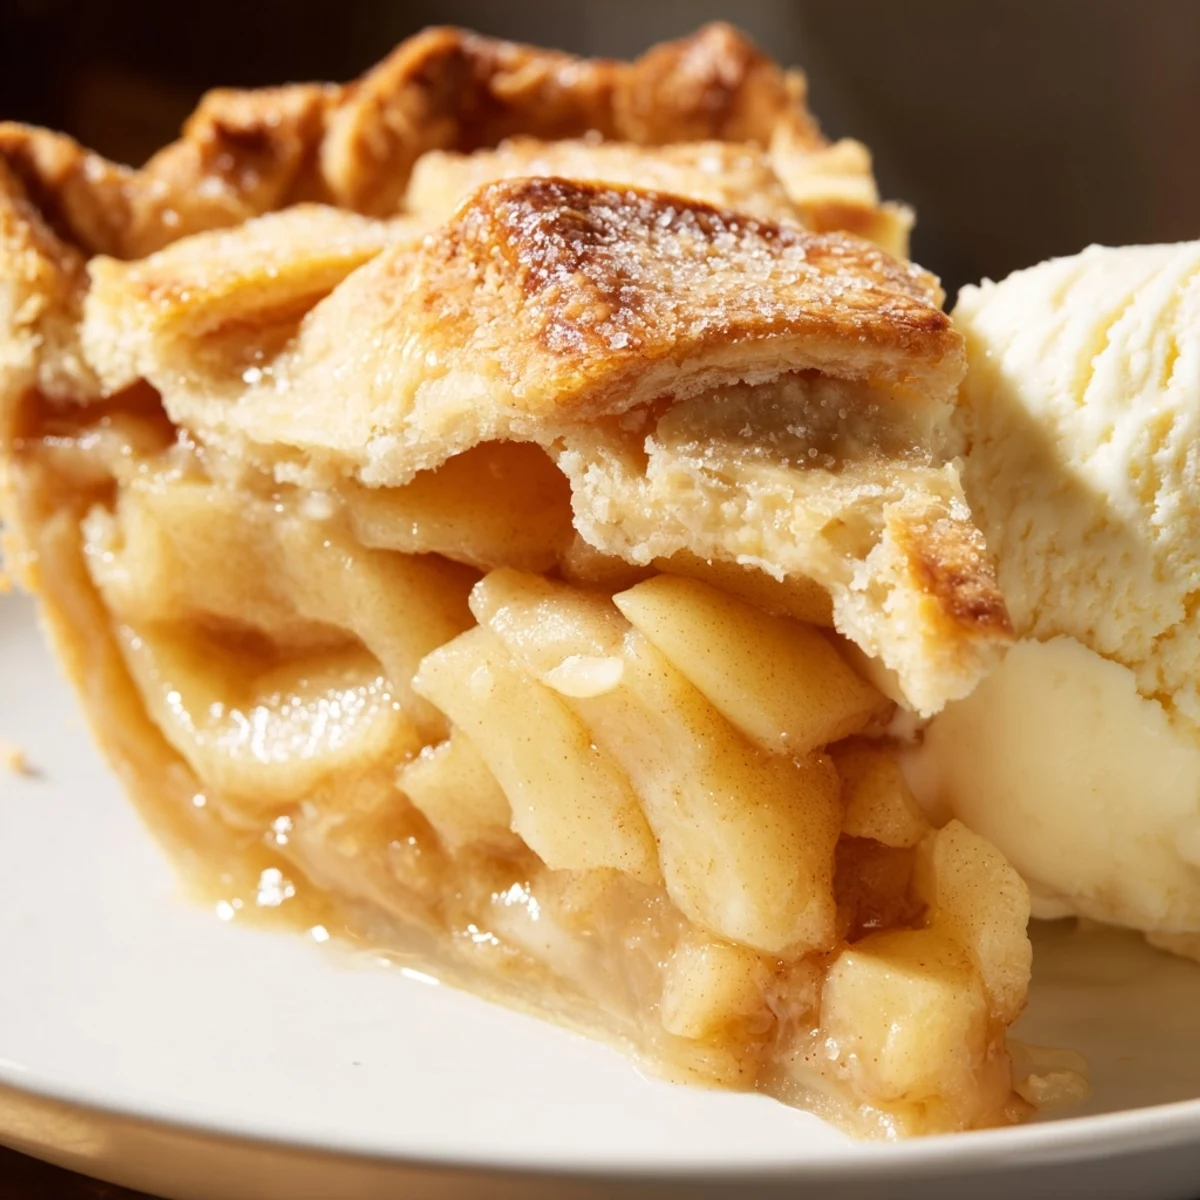
Save This beloved American dessert combines tart Granny Smith apples with warm cinnamon, nutmeg, and cloves, all nestled inside a golden, flaky homemade butter crust. The filling strikes the perfect balance between sweet and tangy, while the crust bakes up beautifully crisp and tender. After baking, let the pie cool for at least two hours to allow the filling to set properly—though it's absolutely divine served warm with a scoop of vanilla ice cream melting over the top.
My grandmother never measured anything when she made apple pie, she just knew by the way the dough felt under her fingertips and how the apples smelled when she tossed them with cinnamon. I spent years trying to capture that same intuitive magic in my own kitchen, watching countless pie crusts turn into tough disasters before finally understanding what she meant about trusting your senses.
The first time I made this for a Friendsgiving dinner, my friend Sarah actually gasped when she took her first bite, the cinnamon scent filling her tiny apartment. It has become our annual tradition now, with everyone gathering around while the pie cools, trading stories and watching steam rise through those little vent slits.
Ingredients
- 2 1/2 cups all-purpose flour: The foundation of your crust, keep some extra for dusting your work surface
- 1 cup unsalted butter, cold and cubed: Cold butter creates those flaky layers we all love, do not let it warm up
- 1 tsp salt: Enhances the butter flavor without making the crust taste salty
- 1 tbsp granulated sugar: Just enough sweetness to balance the crust without competing with the filling
- 6 to 8 tbsp ice water: The magic that brings everything together, add it gradually until the dough cooperates
- 6 cups tart apples: Granny Smiths hold their shape beautifully and provide that perfect contrast to the sweet spices
- 3/4 cup granulated sugar and 1/4 cup brown sugar: The combination gives you depth and that gorgeous caramel color
- 2 tbsp all-purpose flour: Thickens the juices just enough so you do not end up with soup in your pie plate
- 1 tbsp lemon juice: Keeps apples from turning brown and adds brightness that cuts through all that sugar
- 1 1/2 tsp ground cinnamon, 1/4 tsp nutmeg, 1/8 tsp cloves: The classic trio that makes your kitchen smell like heaven
- 2 tbsp unsalted butter: Those little butter dots scattered over the apples create the most incredible richness
- 1 egg and 1 tbsp milk: Whisked together for that golden professional looking finish
Instructions
- Prepare the Pie Crust:
- Whisk flour, salt, and sugar in a large bowl, then work in cold butter with a pastry cutter until you see pea sized pieces. Drizzle in ice water a tablespoon at a time, tossing with a fork until the dough holds together when squeezed. Divide in half, form discs, wrap, and chill for at least an hour to relax the gluten.
- Prepare the Apple Filling:
- Toss sliced apples with both sugars, flour, lemon juice, cinnamon, nutmeg, cloves, and salt until every piece is coated. Let them sit while you roll out the crust to release some juices.
- Roll Out the Dough:
- Flour your surface generously and roll one disc into a 12 inch circle, rotating frequently to prevent sticking. Transfer carefully to your pie dish, letting excess hang over the edges for now.
- Fill the Pie:
- Pile those spice coated apples into the bottom crust, mounding them slightly higher in the center since they will cook down. Scatter the butter pieces over the top for extra richness.
- Top the Pie:
- Roll the second disc and drape it over the apples, then trim and crimp the edges together to seal everything inside. Cut at least five vent slits so steam can escape during baking.
- Apply Egg Wash:
- Brush the entire top crust with the egg milk mixture, getting into all the crevices for even browning. Sprinkle with coarse sugar if you want that bakery style sparkle.
- Bake to Perfection:
- Start at 425 degrees for 20 minutes to set the crust, then reduce to 375 degrees for 35 to 40 minutes until you see golden brown color and bubbling juices. If the edges brown too quickly, tent with foil.
- The Hardest Part:
- Let the pie cool on a wire rack for at least two hours before slicing. This allows the filling to set so you get neat slices instead of a delicious mess on your plate.
 Save
Save This recipe became my go to the winter my neighbor lost her husband and I did not know what to say, so I just showed up with a warm apple pie instead. Sometimes food says what words cannot, especially when it involves cinnamon sugar and flaky pastry.
Choosing Your Apples
I have learned through trial and many mushy pies that you need apples that hold their shape. Granny Smiths are reliable but adding a few Honeycrisps or Braeburns adds sweetness and complexity. Avoid Red Delicious or Gala as they turn to applesauce in the oven.
Mastering the Crimp
Your crimped edge is not just decoration, it is the seal that keeps all those precious juices inside. I use the thumb and pointer finger method, pressing dough between them while pushing from the inside with my other thumb. Do not worry if it is not perfect, rustic charm counts as style.
Serving Suggestions
While vanilla ice cream is classic, I have discovered that salted caramel creates this incredible sweet salty contrast. Warm individual slices for about 20 seconds in the microwave if the pie has cooled completely.
- Cheddar cheese slices on apple pie is not weird, it is genius
- A drizzle of maple syrup over the ice cream adds lovely depth
- This pie actually tastes better the next day as flavors develop
 Save
Save There is something deeply satisfying about pulling a golden apple pie from the oven, steam curling up through those vent slits, carrying the promise of comfort and connection.
Recipe FAQs
- → What type of apples work best for this pie?
-
Tart apples like Granny Smith hold their shape beautifully during baking and provide a nice contrast to the sweet filling. You can also mix in Honeycrisp or Braeburn for additional flavor complexity.
- → Why must the butter be cold when making the crust?
-
Cold butter creates small pockets of steam during baking, resulting in those coveted flaky layers. Warm butter melts into the flour, making the crust tough rather than tender and flaky.
- → Can I make this ahead of time?
-
The dough can be prepared up to 2 days in advance and refrigerated. You can also fully bake the pie a day ahead—many bakers actually find the flavors improve overnight. Store at room temperature, loosely covered.
- → Why does the pie need to cool for 2 hours before slicing?
-
The filling needs time to set and thicken as it cools. Cutting into it too soon will result in a runny filling that doesn't hold its shape. Patience yields perfectly neat slices.
- → How do I know when the pie is done baking?
-
The crust should be deep golden brown, and you should see the filling bubbling vigorously through the steam vents. If the crust browns too quickly, tent with foil for the last 15 minutes.
- → Can I freeze this pie?
-
Yes, you can freeze unbaked pies for up to 3 months. Wrap tightly in plastic and foil. Bake frozen pies at 425°F for 20 minutes, then reduce to 375°F for an additional 50-60 minutes.
