 Save
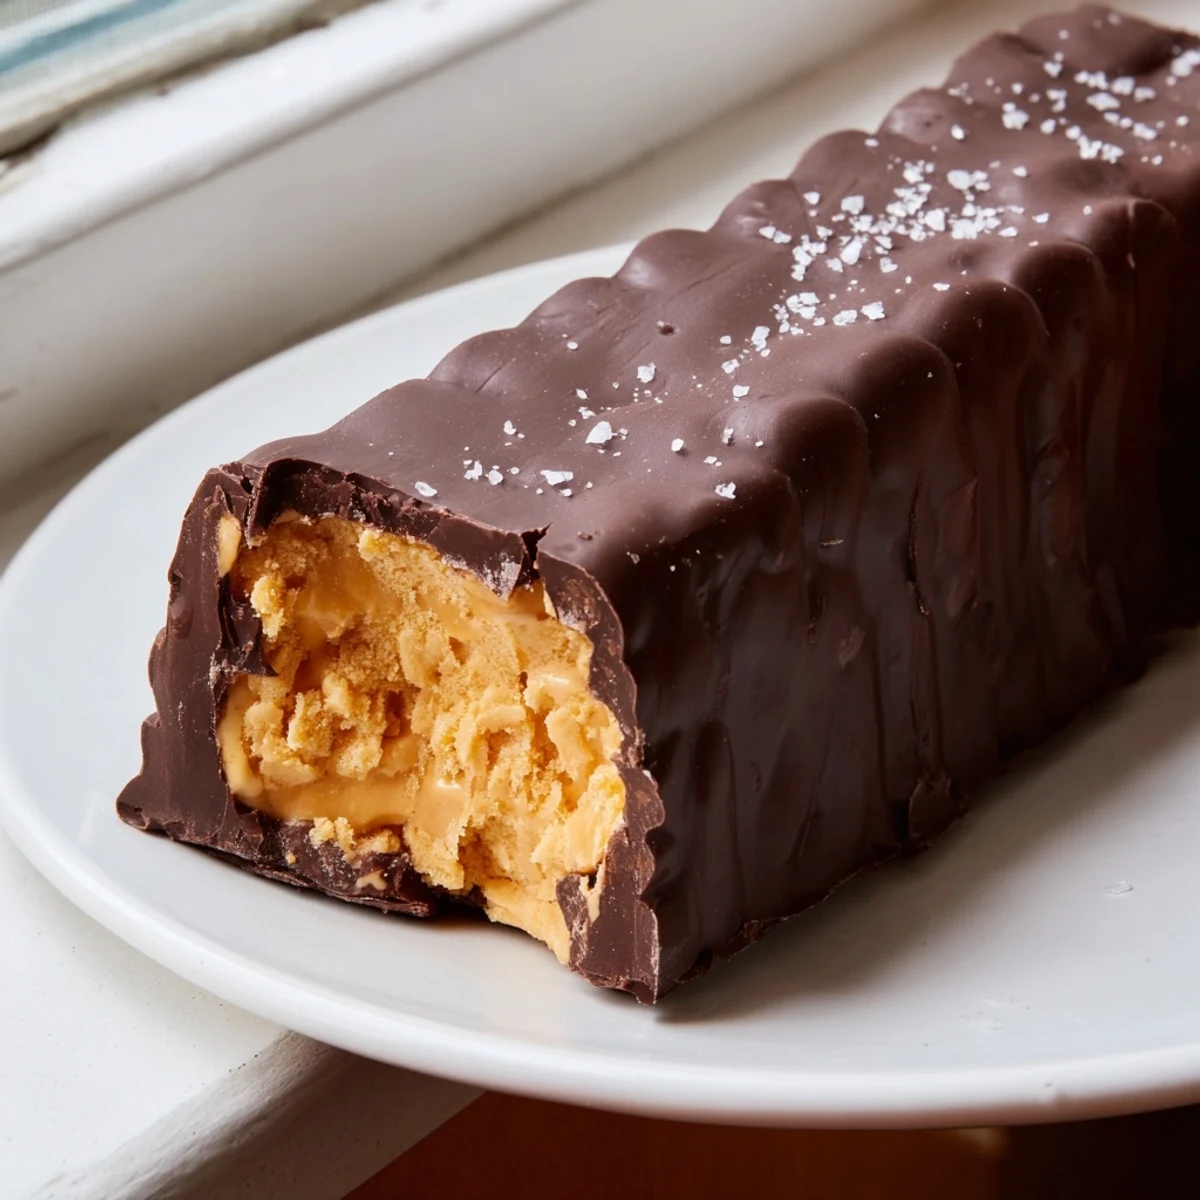
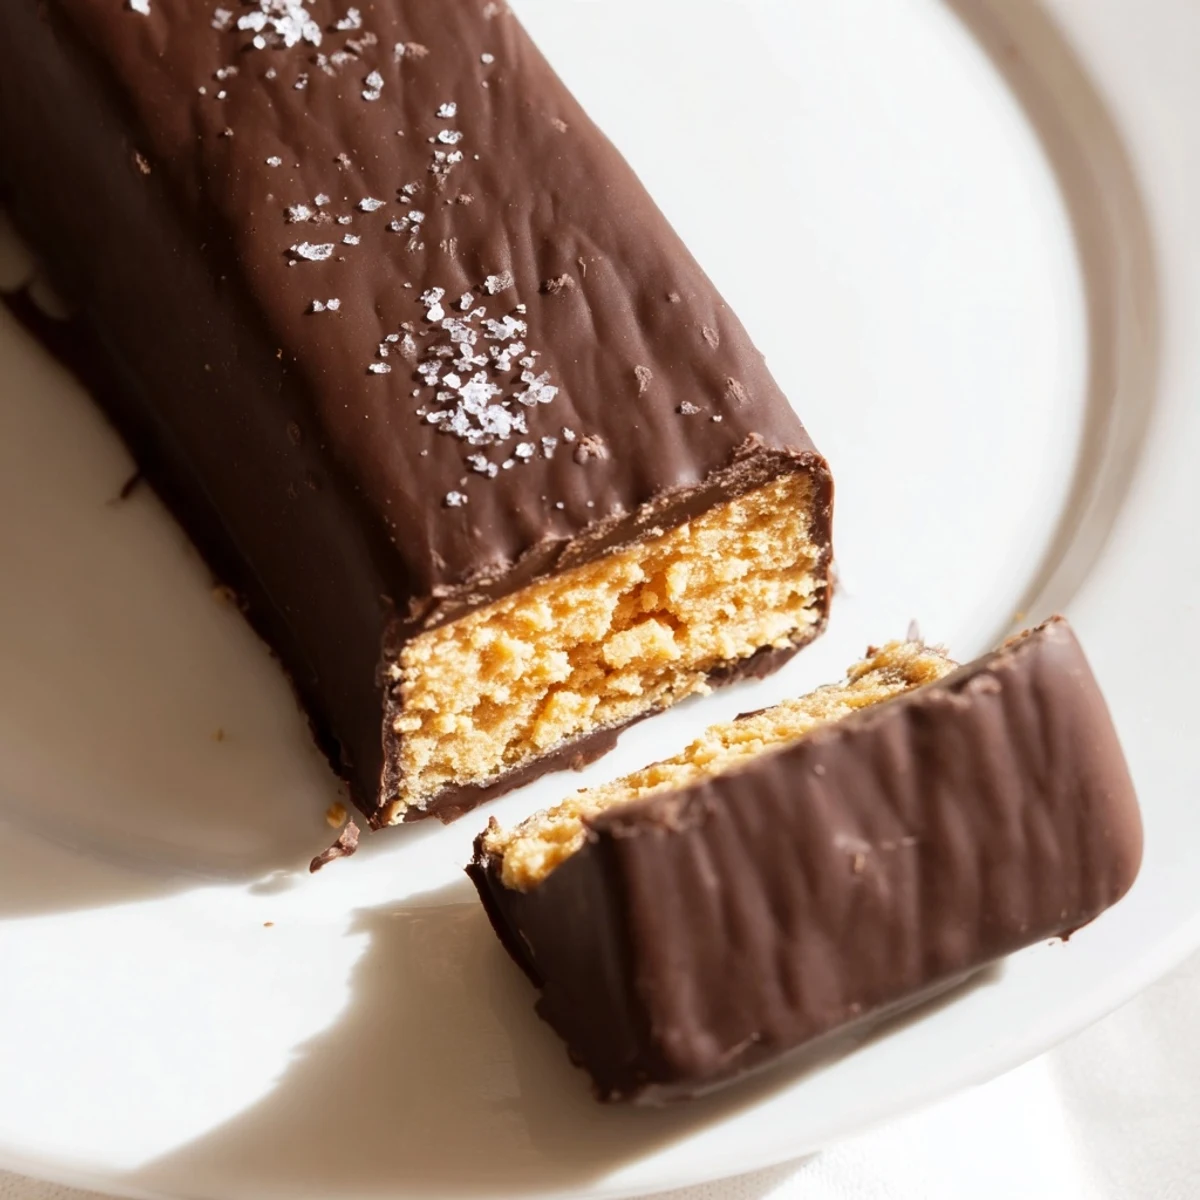
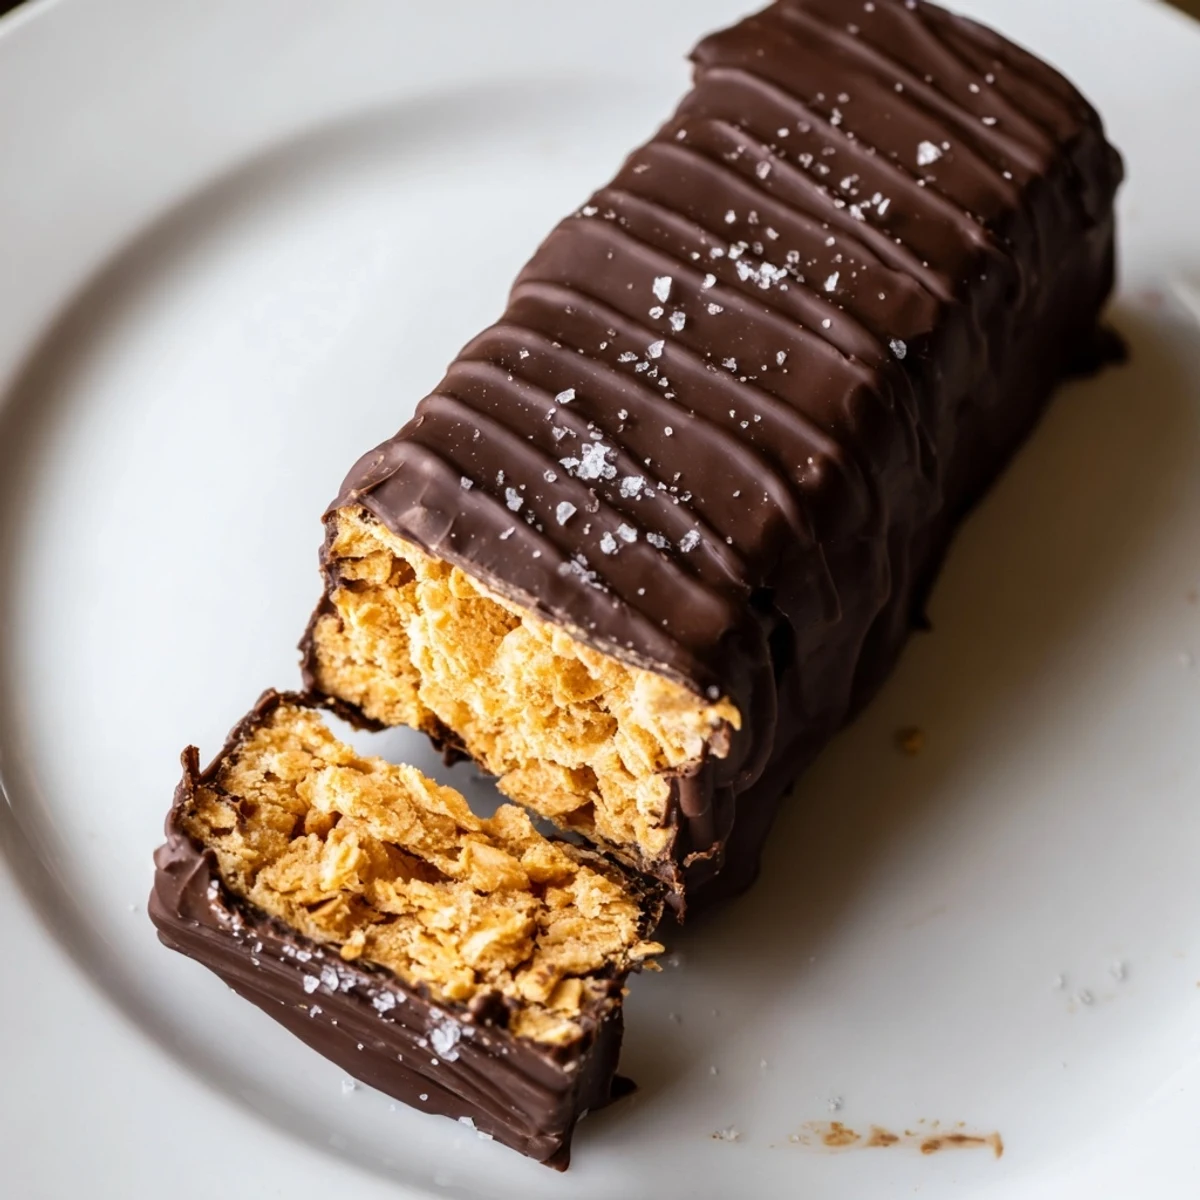
Save These homemade Butterfingers capture everything you love about the classic candy bar with a wholesome twist. A crunchy peanut butter and corn flake center delivers that signature snap, while a generous coating of dark chocolate adds rich, decadent flavor.
Ready in about an hour with just a handful of simple ingredients, they're perfect for meal prep or an afternoon sweet craving. Keep them stored in the fridge for a firm, satisfying bite any time you need a treat.
The candy aisle at the grocery store used to call my name every single time, especially around Halloween when those orange and yellow wrappers seemed to multiply on the shelves. Something about that brittle, peanut butter crunch coated in chocolate kept me reaching for one more, then one more after that. Turning that obsession into something I could feel good about eating in my own kitchen became a weekend project that changed how I think about treats forever.
My neighbor Dave stopped by unannounced one autumn evening while I was cutting a fresh batch into bars, chocolate still glistening on my fingertips. He grabbed one before I even offered, took a bite, and stood there in the doorway completely silent for a solid ten seconds. He now texts me every few weeks asking if my secret stash has been replenished, and I pretend to be annoyed but honestly it makes my whole week.
Ingredients
- Natural creamy peanut butter (1 cup): Use the kind with just peanuts and salt on the label, nothing else, because the oils in processed brands throw off the texture and make the layer greasy instead of snappy.
- Pure maple syrup or honey (1/2 cup): Maple syrup keeps it vegan and adds a subtle caramel depth that pairs beautifully with the peanut butter, but honey works beautifully if that is what you have on hand.
- Corn flakes, lightly crushed (2 cups): This is the magic ingredient that gives you that signature Butterfinger flaky crunch, and the key is crushing them gently so you still have some texture rather than turning everything to dust.
- Dark chocolate chips, at least 70 percent cacao (1 and 1/2 cups): The higher cacao percentage balances the sweetness of the peanut butter filling and gives you that rich snap when you bite in.
- Coconut oil (1 tablespoon): Just a small amount stirred into the chocolate creates a smoother coating and helps it set with a beautiful glossy finish.
Instructions
- Prepare your pan:
- Tear off a sheet of parchment paper and press it into your 8 by 8 inch baking dish, letting the edges hang over the sides like handles so you can lift the whole slab out later without any drama.
- Melt the base together:
- Set your saucepan over low heat and drop in the peanut butter and maple syrup, stirring gently and constantly so nothing scorches on the bottom. Within two or three minutes you will have a silky, golden pool that smells like the best sandwich you never ate.
- Fold in the crunch:
- Pull the pan off the heat and carefully fold in your crushed corn flakes with a spatula, turning everything gently until every flake is coated and the mixture looks like a beautiful, sticky haystack.
- Press and freeze:
- Transfer the mixture into your prepared dish and press it down firmly with the back of a spoon or your hands, making sure it reaches into the corners and sits in an even, flat layer. Slide the whole dish into the freezer for twenty to thirty minutes until it is completely firm to the touch.
- Melt the chocolate coating:
- While the filling firms up, set a heatproof bowl over a pan of barely simmering water and add your chocolate chips and coconut oil, stirring slowly until everything melts into a glossy, dippable pool. Keep the heat gentle because scorched chocolate is a heartbreak you do not need today.
- Cut and dip:
- Lift the frozen peanut butter slab out of the dish using the parchment overhang and cut it into twelve even bars with a sharp knife. One at a time, lower each bar into the melted chocolate on a fork, flip to coat all sides, and tap off the excess before setting it on a clean parchment lined tray.
- Chill until set:
- Slide the tray into the refrigerator for at least twenty minutes so the chocolate can firm up into that satisfying, snappy shell. Try to resist eating them straight from the tray while they are still warm and messy, though nobody will judge you if you do.
 Save
Save I packed a small tin of these into my sisters care package when she was studying for her bar exam, and she called me at midnight to say they were the only thing getting her through constitutional law. Food does that sometimes, becoming part of a moment bigger than just a recipe.
Storing Your Bars
Keep your finished bars in an airtight container in the refrigerator and they will stay fresh and delicious for up to a week. If you need to stash them longer, layer them between sheets of parchment in a freezer safe container and they will keep for about two months, though in my experience they never actually last that long.
Swaps and Substitutions
Almond butter or sunflower seed butter work perfectly in place of peanut butter if you are cooking for someone with an allergy, though the flavor profile will shift in a really nice way. For a fully vegan version, stick with maple syrup and double check that your chocolate chips contain no dairy, which most dark chocolate brands already handle beautifully.
A Few Final Thoughts
Sprinkle a tiny pinch of flaky sea salt on top of each bar right after dipping and you will unlock a whole new level of flavor that makes these taste like they came from a fancy chocolate shop. The contrast of sweet, salty, and crunchy is genuinely addictive, so consider yourself warned.
- Let the bars sit at room temperature for about five minutes before eating so the peanut butter layer softens just slightly for the best texture.
- Use a ruler or bench scraper to score the slab before cutting if you want perfectly even bars that look as good as they taste.
- Always check your corn flake label for gluten free certification if that matters to you, because not all brands guarantee it.
 Save
Save Homemade candy always feels like a small act of magic, turning a handful of simple ingredients into something that makes people close their eyes when they take the first bite. Keep a batch in your fridge and you will always have a little something sweet to share.
Recipe FAQs
- → How should I store homemade Butterfingers?
-
Store your bars in an airtight container in the refrigerator for up to one week. For longer storage, freeze them for up to three months. Let frozen bars sit at room temperature for a few minutes before enjoying.
- → Can I make these Butterfingers vegan?
-
Yes, simply use maple syrup instead of honey and choose dairy-free dark chocolate chips. Most dark chocolate with 70% cacao or higher is naturally dairy-free, but always check the label to be sure.
- → What can I substitute for peanut butter?
-
Almond butter or sunflower seed butter work great as peanut-free alternatives. Sunflower seed butter is especially helpful for school-safe treats. Keep in mind that different nut butters will slightly alter the flavor profile.
- → Why are my bars not holding together well?
-
Make sure you press the peanut butter and corn flake mixture very firmly into the dish before freezing. The freezing step is crucial—give it at least 20 to 30 minutes so the bars become solid enough to cut and dip without crumbling.
- → Can I use milk chocolate instead of dark chocolate?
-
Absolutely. Milk chocolate will give a sweeter, creamier coating that's closer to the traditional Butterfinger taste. Just note that dark chocolate provides a nice contrast to the sweet filling and contains less sugar overall.
- → How do I get a smooth chocolate coating?
-
Melt the chocolate slowly using a double boiler method with coconut oil for a silky finish. When dipping, tap the fork gently against the bowl edge to remove excess chocolate. Working quickly while the chocolate is warm ensures an even coat.
