 Save
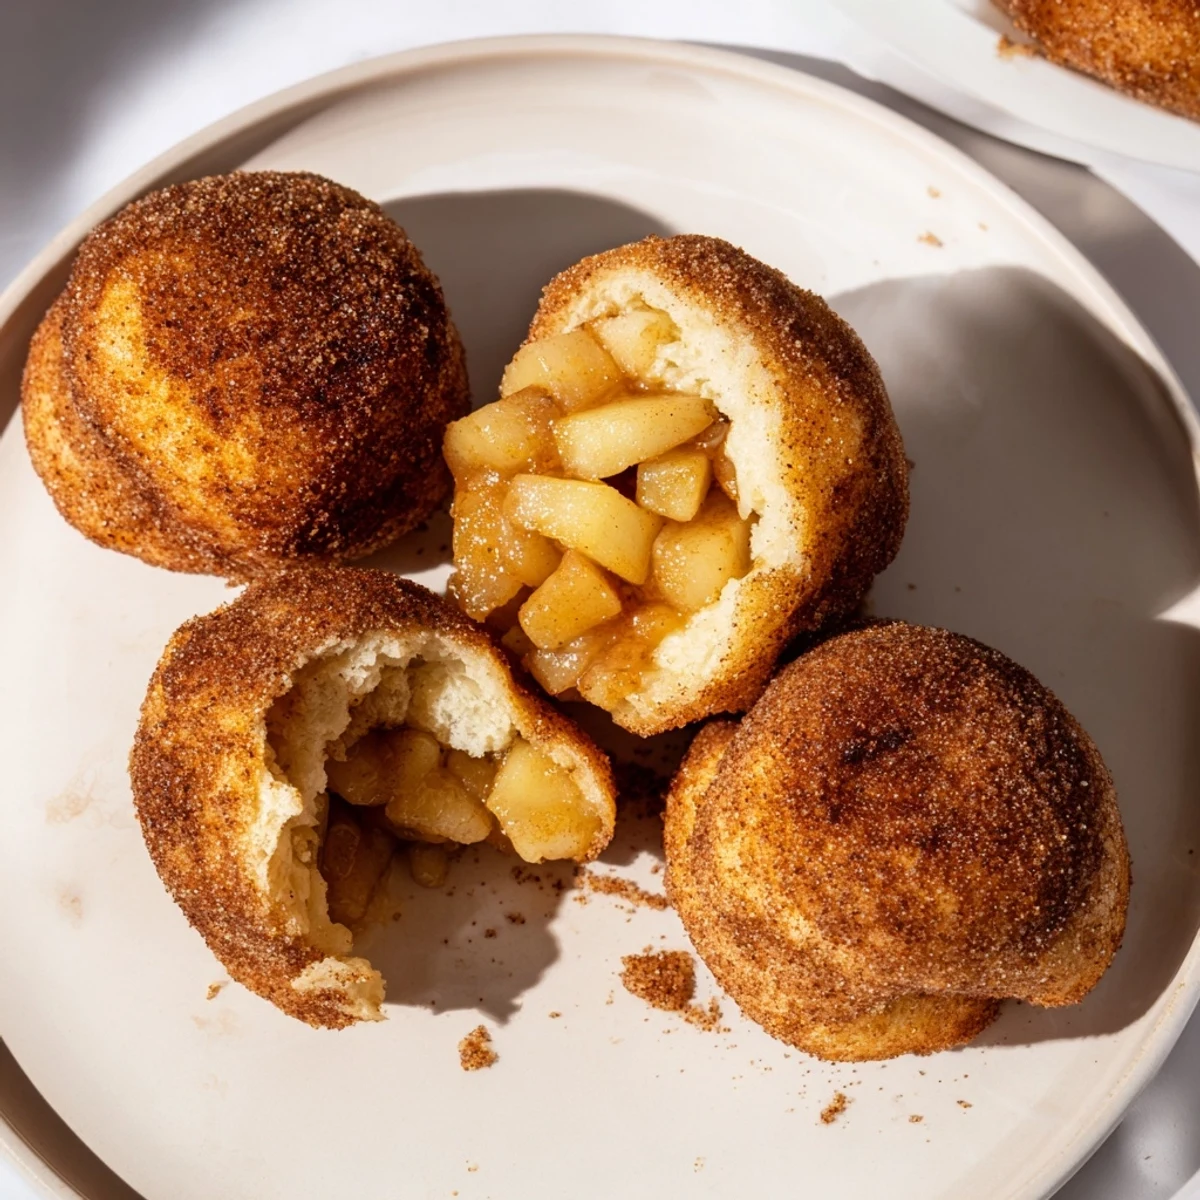
Save These delightful handheld treats combine refrigerated biscuit dough with a homemade spiced apple filling and soft caramel centers. The dough is wrapped around the filling, sealed into balls, coated in butter and cinnamon sugar, then baked until golden brown and puffed.
What makes these special is the contrast between the crisp, sugary exterior and the soft, gooey interior—the melted caramel creates an irresistible sauce that mingles with the tender, cinnamon-spiced apples. Each bite delivers warm comfort with minimal effort.
The process comes together in just 40 minutes, making them perfect for weeknight desserts, casual gatherings, or whenever you crave something sweet and satisfying. Serve them warm for the best experience.
My kitchen smelled like autumn took up residence in my oven when I first made these on a rainy Sunday afternoon. I had extra apples from an orchard trip that was supposed to be "quick" but turned into hours of picking everything in sight. These little packages of caramel and spice became my go-to for unexpected guests and cozy evenings alike.
Last Thanksgiving my sister walked in while these were baking and actually stopped in her tracks. She said the combination of cinnamon and butter reminded her of the caramel apples we used to get at the county fair as kids. Now she requests them every time she visits, and honestly, so do I.
Ingredients
- 2 medium apples: Granny Smith brings tartness while Honeycrisp adds natural sweetness, both hold their shape beautifully when cooked
- 2 tbsp unsalted butter: Creates that rich caramelization with the brown sugar and apples
- 2 tbsp brown sugar: Deepens the apple flavor and helps create that syrupy filling consistency
- 1 tsp ground cinnamon: The classic warming spice that makes everything taste like home
- Pinch of salt: Balances the sweetness and makes all the flavors pop
- 12 soft caramel candies: Unwrap them beforehand because sticky fingers make everything harder later
- 1 can refrigerated biscuit dough: The shortcut that actually works beautifully here, no judgment needed
- 3 tbsp unsalted butter melted: For brushing outside and helping that cinnamon sugar stick
- 1/3 cup granulated sugar: Creates that crispy, sweet exterior we all love
- 1 tsp ground cinnamon: Because you can never have too much cinnamon in my book
Instructions
- Preheat and prep your space:
- Set your oven to 350°F and line a baking sheet with parchment paper so nothing sticks and cleanup is a breeze
- Cook the apple filling:
- Melt butter in a small skillet over medium heat, then add diced apples, brown sugar, cinnamon, and salt, cooking for 4-5 minutes until tender and fragrant
- Let it cool slightly:
- This step is crucial because hot filling will melt your dough and make sealing impossible
- Flatten the dough:
- Separate biscuits and gently press each into a 4-inch circle, working from the center outward
- Fill each bomb:
- Place about 1 tablespoon of cooled apple filling and one caramel candy in the center of each circle
- Seal them tight:
- Gather edges and pinch firmly to close, placing seam-side down on your prepared baking sheet
- Butter them up:
- Brush each pie bomb generously with melted butter so the coating has something to grab onto
- Add the cinnamon sugar:
- Mix sugar and cinnamon in a small bowl, then sprinkle it over the buttered bombs
- Bake until golden:
- Put them in the oven for 15-20 minutes until they are puffed and beautifully browned
- Wait before eating:
- Cool for just a few minutes because that caramel becomes like molten lava in the oven
 Save
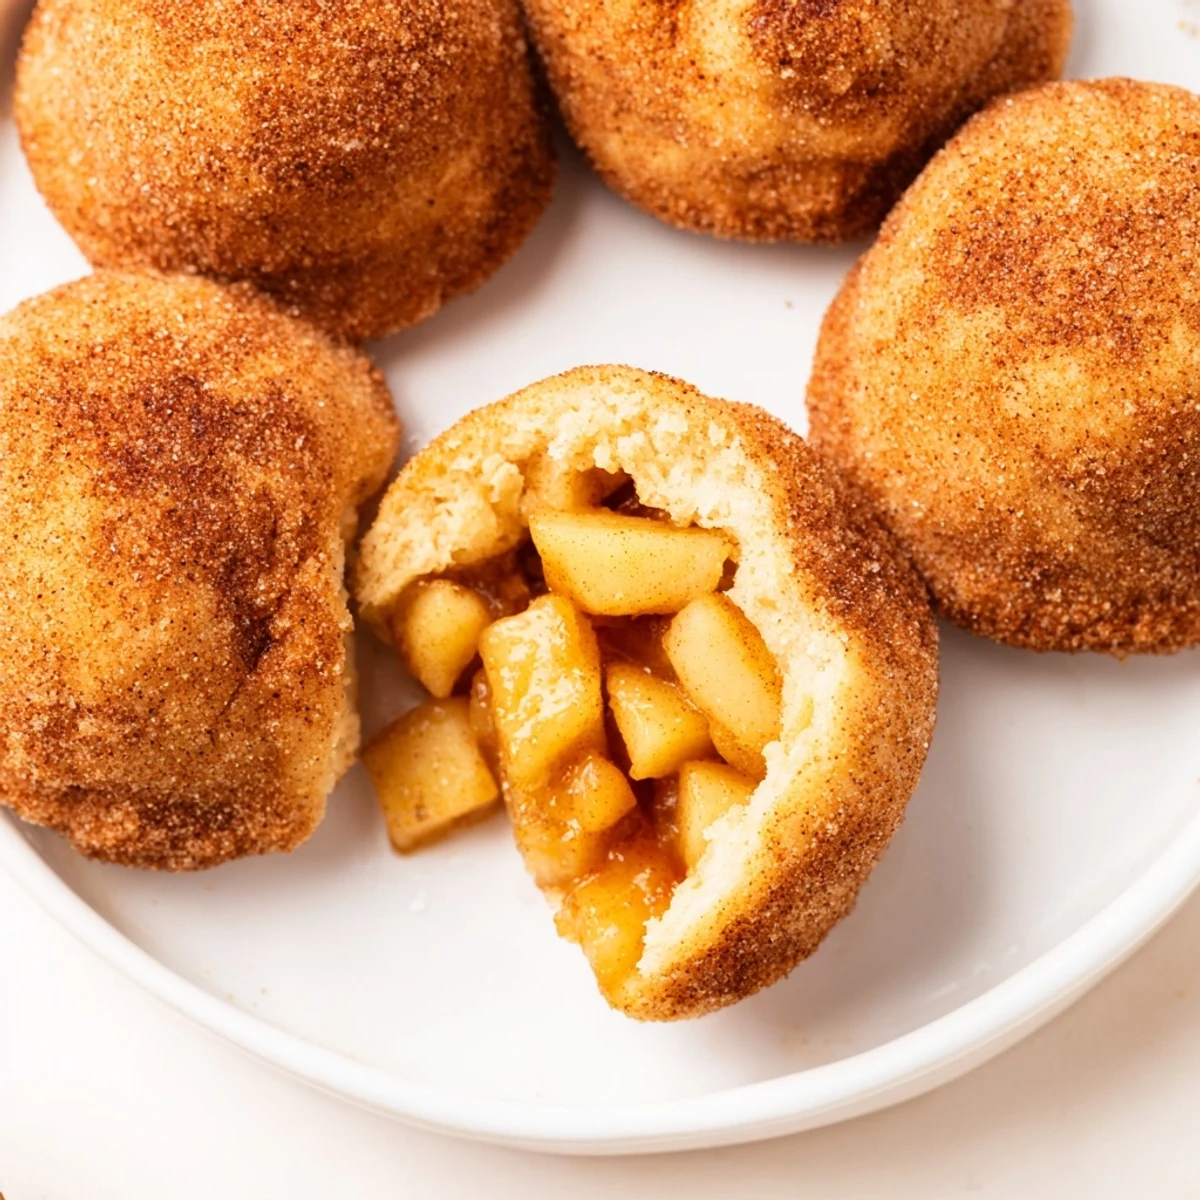
Save These became my daughters favorite after-school treat last fall. Now whenever she smells cinnamon, she asks if we are having what she calls "apple surprise bites."> Watching her break one open and seeing the caramel stretch is worth every minute of prep work.
Dough Options That Actually Work
I have experimented with pizza dough and crescent rolls when biscuit dough was not available. Pizza dough makes a chewier, breadier bomb while crescent rolls create lighter, flakier results. Both are delicious in their own way and bake up beautifully.
Spice It Your Way
Sometimes I add a pinch of nutmeg or cardamom when I am feeling adventurous. A tiny bit of ginger adds warmth that works especially well on cold winter nights. Start with small amounts because these spices are potent.
Serving Ideas and Make-Ahead Tips
These are best served warm but can be reheated in the microwave for 15-20 seconds. I make the apple filling ahead and keep it in the refrigerator, then assemble and bake fresh when guests arrive. The smell alone will make everyone think you spent hours in the kitchen.
- Vanilla ice cream is practically mandatory for serving
- A drizzle of extra caramel sauce never hurt anyone
- Chopped pecans inside the filling add amazing texture
 Save
Save There is something deeply satisfying about breaking into that golden crust and finding warm spiced apples and melted caramel inside. These little bombs of happiness turn an ordinary Tuesday into something worth celebrating.
Recipe FAQs
- → Can I make these ahead of time?
-
Yes, you can assemble the bombs up to 24 hours in advance. Store them covered in the refrigerator and bake when ready to serve. They may need an extra minute or two in the oven if baked cold.
- → What type of apples work best?
-
Granny Smith or Honeycrisp apples are ideal because they hold their shape during cooking and provide a nice tart balance to the sweet caramel. Firm varieties like Fuji or Braeburn also work well.
- → Can I use homemade dough instead of refrigerated?
-
Absolutely. You can use homemade pizza dough, crescent dough, or even pie crust. Just roll it out to similar thickness and cut into circles. The baking time may vary slightly depending on the dough type.
- → Why did my caramel leak out during baking?
-
This usually happens if the dough isn't sealed tightly enough. Make sure to pinch the edges firmly and place them seam-side down. If some leaks, don't worry—they'll still taste delicious, just possibly less gooey inside.
- → How should I store leftovers?
-
Store in an airtight container at room temperature for up to 2 days. For longer storage, refrigerate for up to 5 days. Reheat in the oven at 350°F for 5-7 minutes to restore the crisp exterior and warm the filling.
- → Can I freeze these?
-
Yes, freeze unbaked bombs on a baking sheet until solid, then transfer to a freezer bag for up to 3 months. Bake from frozen, adding 3-5 minutes to the baking time. Already-baked bombs can be frozen for up to 2 months.
