 Save
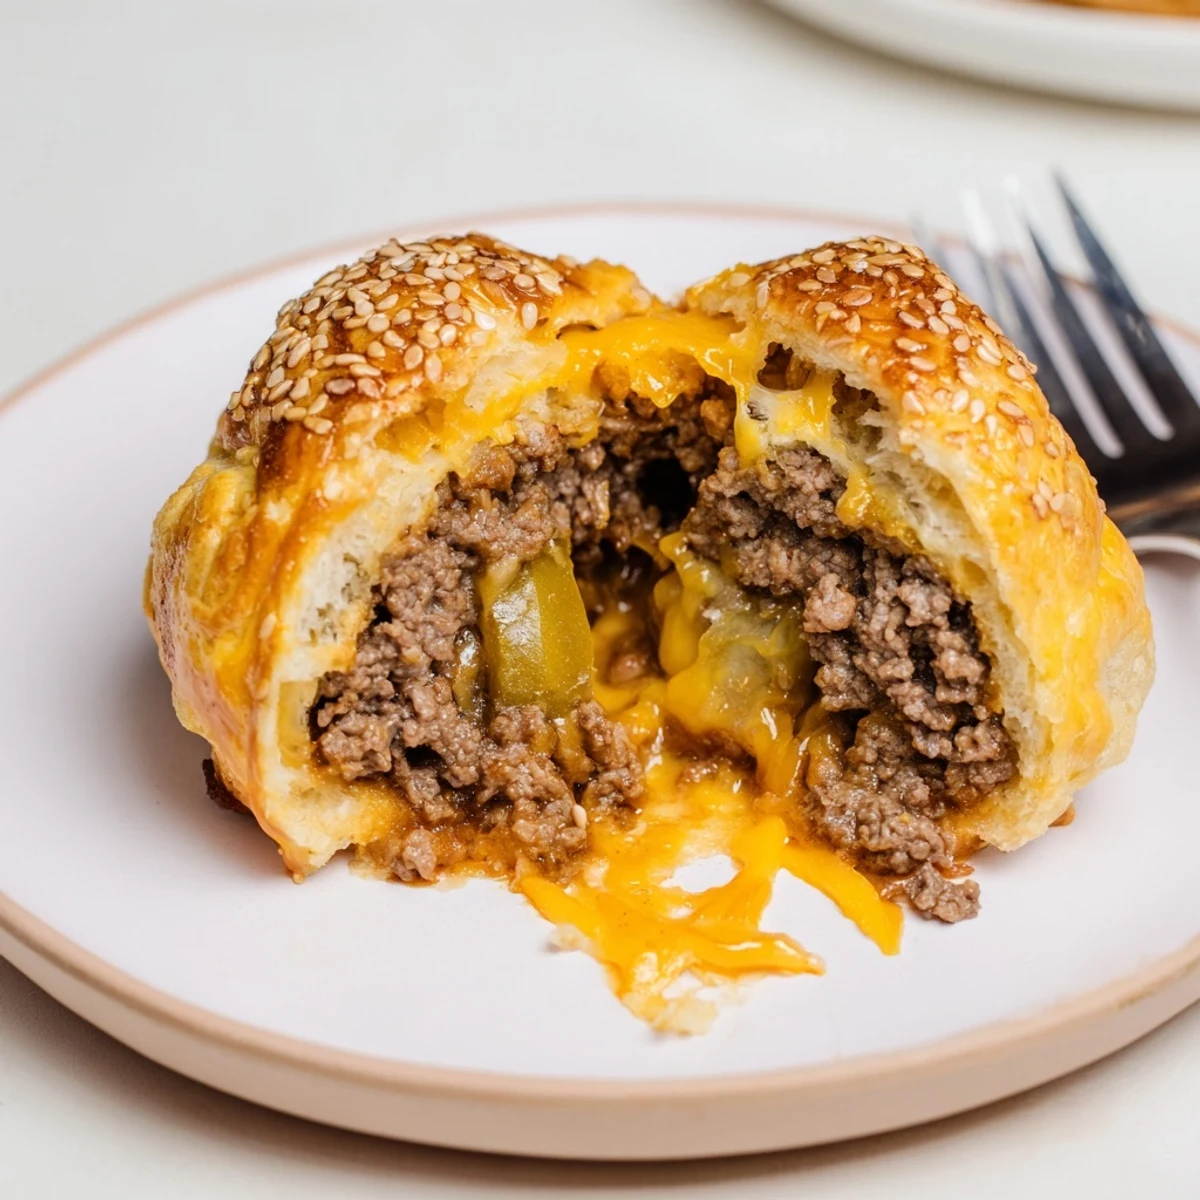
Save Come together in about 50 minutes to make eight golden biscuit parcels: sauté onion with ground beef, stir in ketchup, mustard and Worcestershire, cool slightly, then mound beef and two cheeses in each flattened biscuit, seal and brush with egg wash. Bake until deeply golden and let rest briefly. Serve warm with extra burger sauces; swap in pepper jack or bacon to vary the heat and richness.
The sizzle of onions hitting the skillet always means something tasty is about to happen in my kitchen. These cheeseburger bombs were the result of a last-minute craving, biscuit dough beckoning from the fridge, and a daring decision to break away from plain burgers. Wrapping all the classic fixings in a golden parcel felt downright playful, and I couldn't help but laugh at the cheesy mess splattering across my apron the first time. The aroma that fills up the kitchen as they bake is pure anticipation.
One rainy Saturday, I lined up a tray of these for movie night with my family, and everyone hovered by the oven waiting for the cheese to bubble. There was a mad dash for seconds, proof that nothing brings people together like finger food you can pull apart with a grin. Watching cheese strings stretch from the flaky biscuits to giggling mouths turned a simple meal into an event. I still find bits of sesame seed in the oddest places days afterward, a testament to just how much fun we had eating them.
Ingredients
- Ground beef: Browning the beef with onion adds depth, and draining it keeps your bombs from going soggy.
- Cheddar cheese (shredded): I pile this in for tangy richness and grate it fresh when I can–it melts better that way.
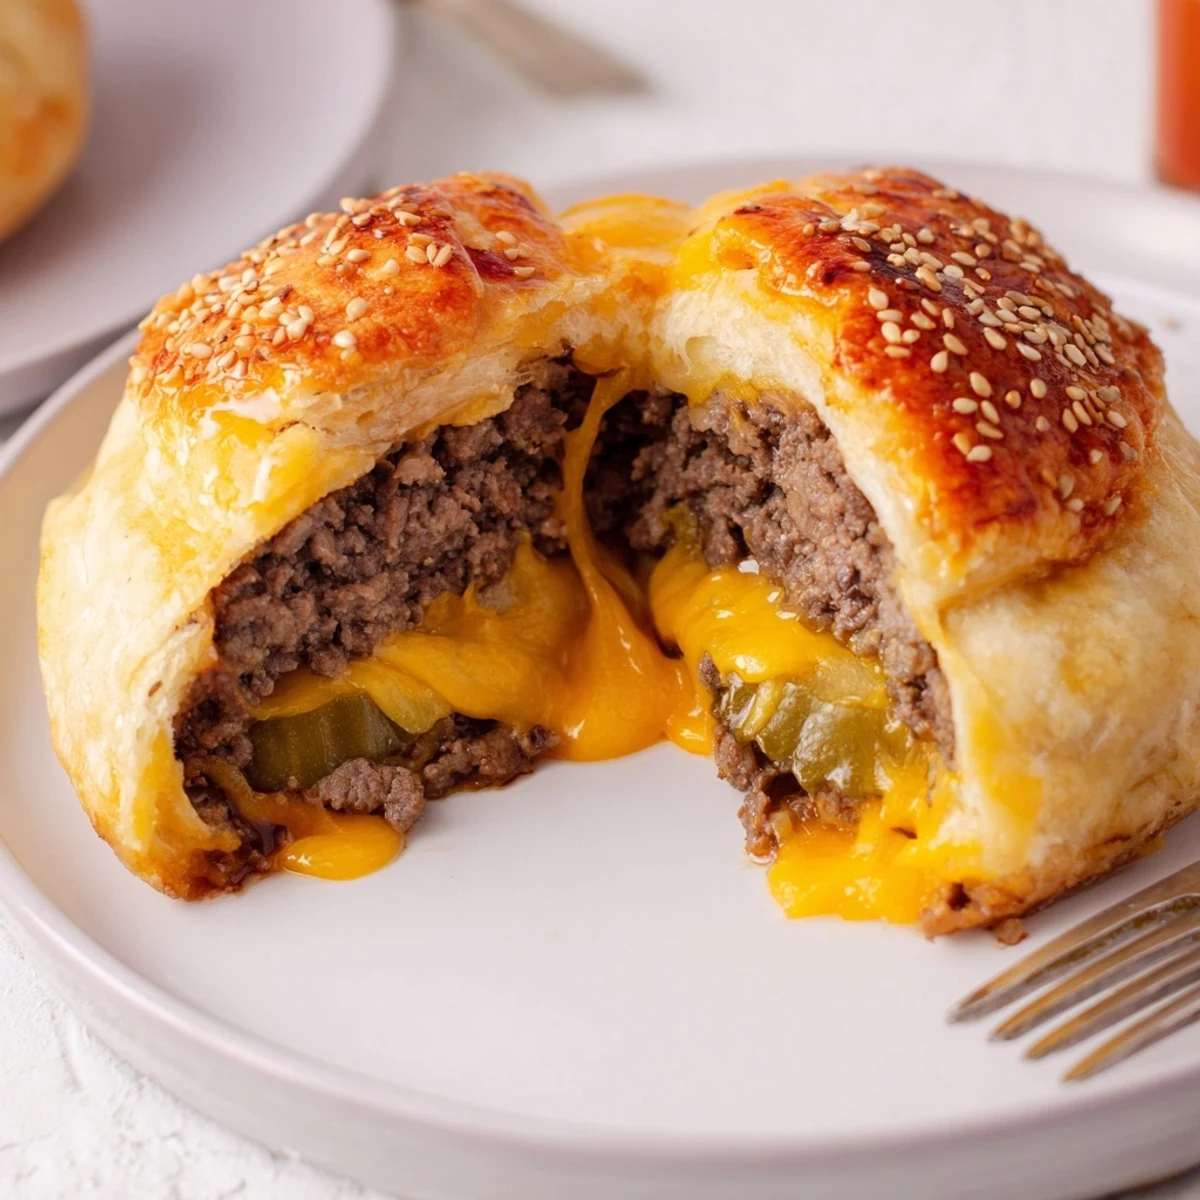
- Mozzarella cubes: Tucking a cube in each bomb is my favorite part; it creates that dramatic cheese pull you can’t resist.
- Onion (finely diced): Sautéing until translucent tames the sharpness and delivers a mellow flavor to the filling.
- Pickle (finely chopped, optional): Lucky enough to love pickles? They add tang and crunch, but you can skip if you’re not a fan.
- Refrigerated biscuit dough: These make prep speedy and bake up fluffy and golden; let them warm up a minute for easier shaping.
- Ketchup: A squeeze for that classic cheeseburger flavor; I prefer the thick kind so the filling isn’t runny.
- Yellow mustard: Brings brightness and zing, just like on your favorite burger.
- Worcestershire sauce: Just a dash, but it deepens the savory flavor; don’t skip this if you can help it.
- Garlic powder: It perks everything up with a hint of warmth; be careful not to overdo it.
- Salt and black pepper: Essential for seasoning–taste your beef mix before wrapping to get it just right.
- Egg (beaten): Brushing the bombs gives them their sun-kissed shine.
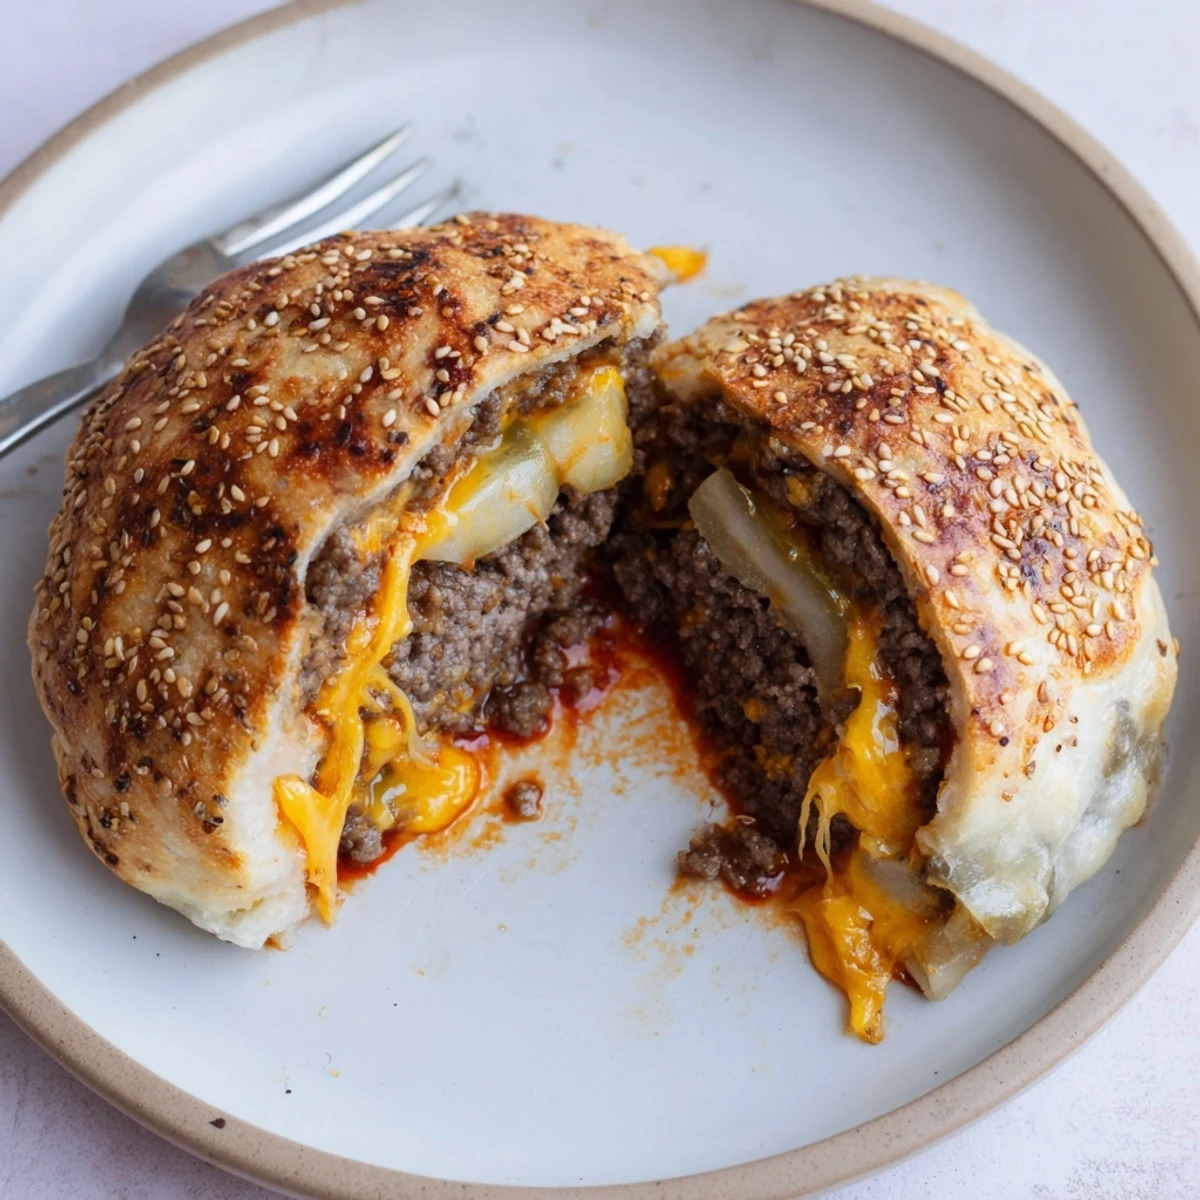
- Sesame seeds: A final sprinkle that’s all about nostalgia–they make these look irresistibly like true burgers.
Instructions
- Fire up the oven:
- Preheat to 200°C (400°F) and line your sheet with parchment to prevent sticking and easy cleanup.
- Sauté onion and beef:
- Let onion hiss in a skillet until soft, then crumble in beef and sprinkle on garlic powder, salt, and pepper as it browns; drain off excess fat for a tidy filling.
- Build the burger filling:
- Stir in ketchup, mustard, Worcestershire, and pickles–you’ll smell the unmistakable burger aroma as things blend; remove from the heat and let cool a bit, so you don’t melt the dough.
- Fill the biscuit dough:
- Gently flatten a biscuit disc in your palm, add a tablespoon of beef, a mound of cheddar, then nestle a mozzarella cube on top.
- Seal & shape the bombs:
- Pinch dough edges over the filling and place seam side down, like you’re making plump dumplings; it’s ok if a little cheese peeks out.
- Top and arrange:
- Brush each bomb with egg until glistening and shake a shower of sesame seeds on top; space them so they have room to rise.
- Bake to golden perfection:
- Slide the tray in for 15–18 minutes, watching as they puff and bronze up, with cheesy bits escaping here and there.
- Serve and enjoy:
- Let cool just a moment–the filling is molten–then serve with a side of extra sauces for fun dipping.
 Save
Save That first bite, when the hot mozzarella lava steals the spotlight, actually made someone at my table cheer. These little bombs have become a goofy milestone in our family’s list of meals: they’re now requested every time cousins visit or friends crowd around for game night.
Making It Your Own
One evening, I swapped in pepper jack cheese for a dose of heat, and even mixed bacon bits into the beef. A quick scan of the fridge for leftovers almost always yields something extra to tuck inside: jalapeños, cooked mushrooms, even caramelized onions. Play around with fillings to match your crowd, and don’t hesitate to double the batch–they disappear fast.
Serving and Dipping Ideas
Stacked high on a platter with a rainbow of dipping sauces, these always spark a little debate over everyone’s favorite pairing. Our go-to lineup includes honey mustard, smoky barbecue, classic ketchup, and a sriracha mayo for the spice lovers. If you want them party-ready, skewer each bomb with a pick for easy grabbing.
Kitchen Lessons from Cheesy Chaos
Rolling biscuit dough with slightly damp hands keeps it from sticking, and don’t be shy about using flour on your work surface. I learned that letting the bombs cool on the tray for just a few minutes keeps the cheese inside instead of dripping everywhere. Sharing these straight from the oven turns my kitchen into the happiest kind of mess.
- If worried about leaks, reinforce seams by pinching a second time.
- Add a pinch of smoked paprika in the beef for an extra layer of flavor.
- Don’t forget: let the bombs rest before serving to avoid steam burns.
 Save
Save I hope these cheesy cheeseburger bombs spark the same kitchen laughter and happy surprise in your home. They’re impossible to resist as soon as you catch the smell wafting from the oven.
Recipe FAQs
- → How long should they bake?
-
Bake at 200°C (400°F) for 15–18 minutes until the exterior is golden and the filling is hot. Let cool a few minutes before serving to avoid burning from the melted cheese.
- → How can I prevent leaking during baking?
-
Press and pinch the dough edges tightly to form a secure seal. Chilling the filled balls for 10–15 minutes before baking helps the dough hold shape and reduces leaks.
- → Can these be prepped ahead or frozen?
-
Assemble and refrigerate on a tray covered for up to 24 hours; brush with egg wash and bake when ready. For longer storage, freeze individually on a tray, then transfer to a bag and bake from frozen, adding a few extra minutes.
- → What cheeses work best?
-
A sharp cheddar provides flavor while mozzarella adds stretch. Try pepper jack for heat or smoked gouda for a deeper, smoky profile; keep one melty cheese for texture.
- → Any tips for flavor variations?
-
Stir cooked bacon bits into the beef for smokiness, add diced pickles for brightness, or swap mustard types to adjust tang. A sprinkle of sesame seeds adds a nutty finish.
- → How to make a gluten-free version?
-
Use certified gluten-free biscuit dough or pre-made gluten-free dough. Watch closely as baking times may differ and remove once the exterior turns golden.
